
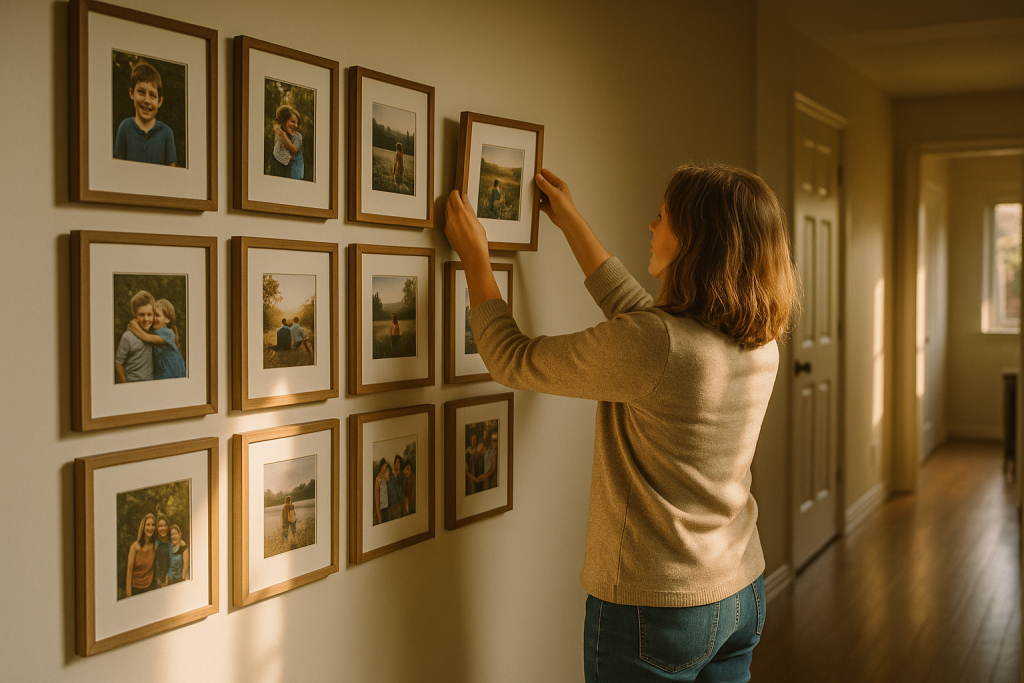
The Impact of Family Photos in Interior Design: Meaningful Mementos That Shape Home Atmosphere
Family photos in interior design do more than fill empty walls; they help create a home that feels grounded, welcoming, and uniquely yours. When you weave cherished snapshots and keepsakes into a room, you’re adding a living layer of story that complements your furniture and finishes. This approach supports both style and well-being, because spaces that reflect our identity naturally feel safer, calmer, and more connected. Research in environmental psychology links personal displays to a stronger sense of place and belonging, which is why “family photos interior” is more than a trend—it’s a design pillar. The right balance of “personalized home accents” and thoughtfully curated “photo display ideas” can transform bland corners into memorable moments. In this guide, we’ll show how to use “memories in design” to add warmth without clutter, and why it’s worth planning these details early in a project. For inspiration and support at any stage, Envia Design can help shape a cohesive plan that integrates storytelling into your layout.
Table of Contents
- A Brief History: How Family Photos Shaped Interiors
- Current Trends: Personalized Home Accents and Memories in Design
- Photo Display Ideas That Blend Style and Story
- Practical Challenges and How to Solve Them
- Future Prospects: Where Memories in Design Go Next
- Company Highlight: Our Approach to Personalized Home Accents
- Interesting FAQ
- Conclusion
A Brief History: How Family Photos Shaped Interiors
Before smartphones, families displayed portraits in parlors as a sign of heritage and connection, and that tradition fed directly into how we decorate today. Early tintypes and studio portraits were centerpieces that inspired the “gallery wall” idea we now love. Over time, albums moved to shelves, frames migrated from mantels to stairways, and today we mix candid snapshots with travel mementos to create layered stories. Design scholars note that personalization—displaying items tied to identity—boosts “place attachment,” the emotional glue between people and their homes. You can see the lineage in modern projects that pair heirloom photos with textiles, ceramics, or pressed botanicals. Even minimal spaces benefit, because a single well-placed portrait can carry the emotional weight of a whole collection. The throughline is simple: interior design is at its best when it reflects who lives there, and family photos make that both visible and beautiful.
Current Trends: Personalized Home Accents and Memories in Design
Today’s “memories in design” movement favors curation over clutter, with tighter color palettes, mixed materials, and modular systems. Slim-profile frames in black, oak, or brass keep the focus on the image, while floating frames add airiness. Designers are combining printed photos with textiles, maps, ticket stubs, and handwritten notes in shadow boxes to build one-of-a-kind “personalized home accents.” Digital frames have surged too, offering rotating albums and remote updates for long-distance families. Another trend is consistency: using the same frame style and mat width for a calm, gallery feel, then inserting a few standout pieces for rhythm. And because life evolves, the best “photo display ideas” plan for swapping and adding images without re-hanging everything. Design for change, not perfection, and your displays stay fresh without constant overhauls.
Photo Display Ideas That Blend Style and Story
Step-by-Step: Build a Gallery Wall That Grows With You
- Start with a theme: family milestones, black-and-white travel, or three generations. Start with storytelling, not symmetry.
- Pick a palette: unify with frame color, mat size, or photo tone (all color, all B&W, or a muted mix).
- Lay it out on the floor: create a main line (top or center) to align frames and avoid visual drift.
- Anchor the composition: choose one larger piece as a focal point, then step down in size around it.
- Use removable templates: trace frames on paper, tape to the wall, and adjust until it feels balanced.
- Hang with care: use sawtooth hangers or a rail system; keep 2–3 inches between frames for breathing room.
Smart Alternatives: Digital Frames vs Prints
- Digital frames: great for large families, frequent updates, and video clips; ideal for kitchens and living rooms.
- Prints: tactile, timeless, and power-free; especially strong in hallways, stairwells, and bedrooms.
- Hybrid approach: a signature printed piece paired with a digital frame nearby for seasonal rotation.
- Tip: Use e-ink displays for a paper-like look with minimal glare and energy use.
Comparison notes: prints excel at permanence and texture, while digital excels at flexibility and volume; choose based on how often you update, how you light the room, and whether you prefer a curated or dynamic experience. For “family photos interior” setups, combining shadow boxes for mementos with a lean digital frame creates depth and movement. Salon-style walls (an eclectic mix of sizes and frames) feel personal and collected, while grid layouts deliver crisp modern order. Neither is “right”—pick the rhythm that matches your architecture and lifestyle. If you’re browsing for inspiration, enviadesign ideas often emphasize cohesive color temperature across images to keep the wall unified.
Practical Challenges and How to Solve Them
Light damage, clutter, and poor scale are the biggest hurdles, but each has a simple fix. Light is both friend and foe for photographs, so place prints out of direct sun and consider UV-filtering glass to reduce fading. If you’re archiving originals, scan them and display high-quality reproductions—“Print what you want to protect.” To avoid clutter, edit ruthlessly and rotate seasonally using storage boxes labeled by theme; this keeps the wall fresh while honoring more memories over time. Scale matters: small frames can disappear over big sofas; aim for a grouping that hits at least two-thirds the width of the furniture below. A few terms to know: “archival mounting” uses acid-free materials that won’t yellow prints, and “UV-filtering glass” blocks UV light to slow fading. Privacy is a final consideration—keep sensitive photos in bedrooms or offices, and use more universal images in public areas.
Future Prospects: Where Memories in Design Go Next
The next wave of “memories in design” is both digital and tactile, giving you more ways to honor your story. Smart frames already allow remote sharing; soon, AI will curate rotating sets that balance faces, places, and color for smoother visual rhythm. Augmented reality can preview “photo display ideas” at scale before you drill a single hole, making layout decisions faster and more accurate. E-ink walls and modular rails will let families reconfigure collections seasonally without damage. On the craft side, 3D-printed relief frames and sustainable woods make the “personalized home accents” category greener and more bespoke. Expect deeper integration of audio—short voice notes attached to photos—so you can hear grandpa tell the story behind the picture. As this tech matures, enviadesign inspirations will likely combine smart curation with heirloom craft for the best of both worlds.
Company Highlight: Our Approach to Personalized Home Accents
Our studio’s process puts your story first, then builds the design around it with careful planning, archival materials, and flexible systems. We begin with a memory audit to identify themes, then design locations and lighting so displays feel intentional, not afterthought. Using museum-grade mats, level rails, and UV-filtering glass, we protect your images while making swaps easy. Services can be delivered remotely or on-site, with mood boards, scaled wall elevations, and installation guides to meet your needs. We also provide digital-asset organization so your cloud albums and printed archives work together seamlessly. Your home should tell the story of who you are, and our role is to translate that story into rooms that feel calm, cohesive, and deeply personal.
Interesting FAQ
How do I choose which photos make the wall?
Pick for story and scale: prioritize images with strong emotion, clear faces, and a mix of close-ups and wider scenes. Keep color temperature consistent and choose one unifying element—mat size, frame color, or photo tone—to pull the set together.
What’s the best height for hanging?
Aim for eye level: place the center of the primary piece around 57–60 inches from the floor, then build the arrangement around it. Above sofas or consoles, keep the bottom of frames 6–10 inches above the surface for a connected feel.
How often should I rotate photos?
Seasonally is ideal; it keeps the space fresh and allows you to celebrate new milestones. Use a labeled storage system and a consistent frame size so swaps take minutes, not hours.
Are digital frames worth it?
Yes if you want frequent updates, video, or shared albums from family. Choose matte screens with ambient sensors to reduce glare and sync brightness to the room.
How do I protect originals?
Scan and store the originals in acid-free sleeves; display high-quality prints behind UV-filtering glass. Keep humidity stable and avoid direct sunlight to extend the life of your images.
Conclusion
When you weave family photos in interior design, you build rooms that feel alive with meaning and easy to love day after day. With a bit of planning, the right materials, and thoughtful “photo display ideas,” your walls can become a lasting album that grows with your life. The goal isn’t perfection—it’s connection, and that’s what “memories in design” delivers when done with care. Whether you prefer a clean grid or an eclectic salon, remember to edit, protect, and rotate so your story stays clear and current. If you’re curating your first wall or refreshing a whole home, start small, trust your eye, and let your memories lead. To learn more and view our other blogs, click here.